How To Install Chair Rail Moulding : Crown Moulding and More | House design, Wall molding ... : Chair rail height is usually 36 in.. Hold a tape measure against the wall to decide how high above the floor to install the molding. Apply wallpaper or paint high enough (or low enough) for the chair rail to cover the edge. Starting in a corner, insert your flat bar between the wall and the moulding. This can be made wider using a 1x6 or 1x8 instead of the 1x4 used here. Step away from the wall and look at the rail.
Steps to installing chair rail: Around the perimeter of the room. The addition of chair rail molding is an easy and fairly inexpensive way to dress up a room. Apply wallpaper or paint high enough (or low enough) for the chair rail to cover the edge. Ensure that the rail is horizontal and at the desired height above the floor.
How to Install a Sophisticated Chair Rail | HGTV from hgtvhome.sndimg.com The best way to update a chair rail is to convert it into wainscoting or board and batten. The addition of chair rail molding is an easy and fairly inexpensive way to dress up a room. Ask a helper to hold a length of chair rail against the wall if there is not an obvious top or bottom to the rail. You'll also learn how to in. The grey chair rail moulding matching the wall color helps create visual interest in this playful living space. Chair rail height is usually 36 in. It's original intent was to provide a bumper for chairs preventing them from touching the wall. I want this room to feel a bit more traditional and chair rail definitely gives off those vibes.
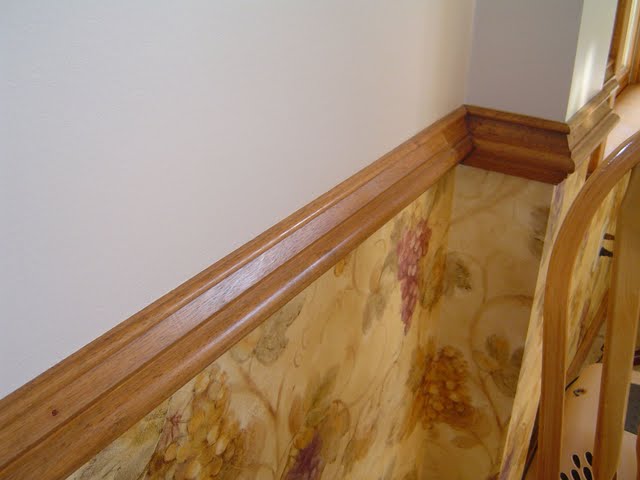
Chair rail molding is profiled with a flat back.
I looked into all kinds of decorative wood wall treatments before deciding on this combo. From the ground, measure 32 inches up and make a mark. Video and instructions about the best process of how to install chair rail. Chair rail molding can both protect walls from chairs and dramatically enhance the look of a room. Set project zip code enter the zip code for the location where labor is hired and materials purchased. This will be the point at which the bottom of the chair rail molding will set. To install the molding, apply wood glue or construction adhesive to the back of the first piece and attach it to the wall, placing the bottom edge of the wood at the guideline you marked in step 3. The addition of chair rail molding is an easy and fairly inexpensive way to dress up a room. It's original intent was to provide a bumper for chairs preventing them from touching the wall. Steps to installing chair rail: Begin by removing the existing chair rail if installed. This will loosen any paint or caulk and prevent damage to the sheetrock. Ask a helper to hold a length of chair rail against the wall if there is not an obvious top or bottom to the rail.
Make the chair rail taller in rooms with higher ceilings. The moulding helps merge traditional and modern design and creates a successful marriage of elegance and comfort. Measure each space on the wall where the chair rail will be installed. Starting in a corner, insert your flat bar between the wall and the moulding. Today they are mostly a room decoration with architectural proportion now playing the main factor in determining the height and style.
How to Install a Chair Rail | how-tos | DIY from img.diynetwork.com Ensure that the rail is horizontal and at the desired height above the floor. I looked into all kinds of decorative wood wall treatments before deciding on this combo. To install the molding, apply wood glue or construction adhesive to the back of the first piece and attach it to the wall, placing the bottom edge of the wood at the guideline you marked in step 3. Steps to installing chair rail: Mark the desired distance from the floor to the top of the chair rail (usually 36 to 38). Step away from the wall and look at the rail. The grey chair rail moulding matching the wall color helps create visual interest in this playful living space. While these walls weren't originally chair rail alone, you can see how the horizontal moulding would act as the beginning point for a gorgeous wall installation that can be as simple or as detailed as your budget/skills allow!
Above the floor but can be installed anywhere from 30 in.
To install the molding, apply wood glue or construction adhesive to the back of the first piece and attach it to the wall, placing the bottom edge of the wood at the guideline you marked in step 3. Measure and cut any miters for the chair rail, especially if you are turning any corners that are not 90º. When installing panel moulding above the dado is becoming a common trend among interior designers and trim carpenters as both help home owners pick out the right styles and profiles which will best suit the subject space. Apply wallpaper or paint high enough (or low enough) for the chair rail to cover the edge. Starting in a corner, insert your flat bar between the wall and the moulding. This will loosen any paint or caulk and prevent damage to the sheetrock. The best way to update a chair rail is to convert it into wainscoting or board and batten. Measure each space on the wall where the chair rail will be installed. Lightly mark the bottom of the chair rail every 3 ft. You'll also learn how to in. The addition of chair rail molding is an easy and fairly inexpensive way to dress up a room. To install this, the 1x4 is nailed to. Plate rails are usually installed about five feet above the floor.
If you are installing the railing to protect the walls from the backs of chairs, this is generally. To estimate costs for your project: Chair rail molding can both protect walls from chairs and dramatically enhance the look of a room. Starting in a corner, insert your flat bar between the wall and the moulding. From the ground, measure 32 inches up and make a mark.
How to Install a Chair Rail Molding from www.stepbystep.com To determine the height of the chair rail, measure the height of the ceiling and divide it by three. Measure the wall according to the length to determine how many lengths of chair rail molding will be needed. Hold a tape measure against the wall to decide how high above the floor to install the molding. To install this, the 1x4 is nailed to. Begin by removing the existing chair rail if installed. If you are installing the railing to protect the walls from the backs of chairs, this is generally. Steps to installing chair rail: Mark the desired distance from the floor to the top of the chair rail (usually 36 to 38).
To estimate costs for your project:
When installing panel moulding above the dado is becoming a common trend among interior designers and trim carpenters as both help home owners pick out the right styles and profiles which will best suit the subject space. Measure each space on the wall where the chair rail will be installed. Mark the desired distance from the floor to the top of the chair rail (usually 36 to 38). From the ground, measure 32 inches up and make a mark. Continue to go around the room making marks about 36 inches apart. To determine the height of the chair rail, measure the height of the ceiling and divide it by three. This will be the point at which the bottom of the chair rail molding will set. To estimate costs for your project: To install this, the 1x4 is nailed to. Hold a tape measure against the wall to decide how high above the floor to install the molding. Around the perimeter of the room. The addition of chair rail molding is an easy and fairly inexpensive way to dress up a room. To install the molding, apply wood glue or construction adhesive to the back of the first piece and attach it to the wall, placing the bottom edge of the wood at the guideline you marked in step 3.